

Reinstall Windows 11 Without Erasing Personal Files
Warning: We cannot guarantee that your personal files or data will not be erased. This process is a last resort
Reinstall Windows 11 Without Erasing Personal Files Video
Continue past next 2 windows until you see the screen in image below and Select “Previous version of Setup”

Click Next on next screen then Click Install Now on the screen after shown below

Select “I don’t have a product key”. You can enter it later

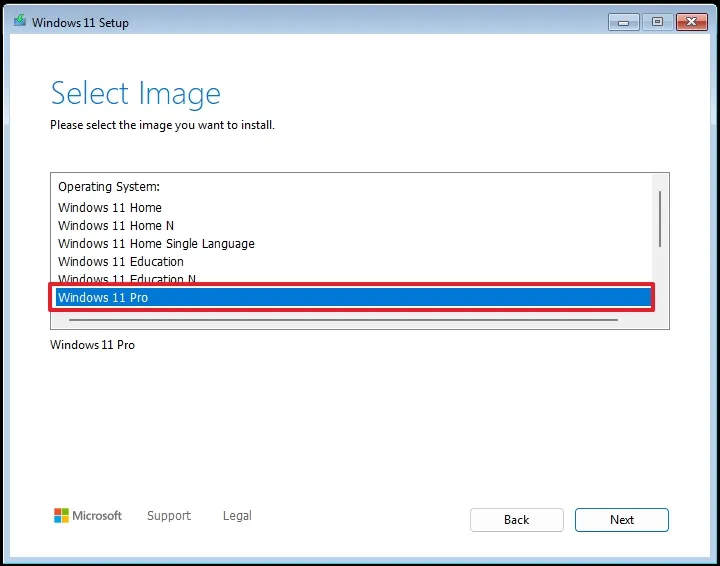
Make sure you select the same version of Windows the computer is running. It should be either Windows 11 Home or Windows 11 Pro
Agree and Continue

Click “Custom: Install Windows only (advanced)”

This step is important. Only click on the drive that Windows is installed on. It will have the largest file size GB is larger than MB. It should be at least 60 GB. Click to highlight it & Next

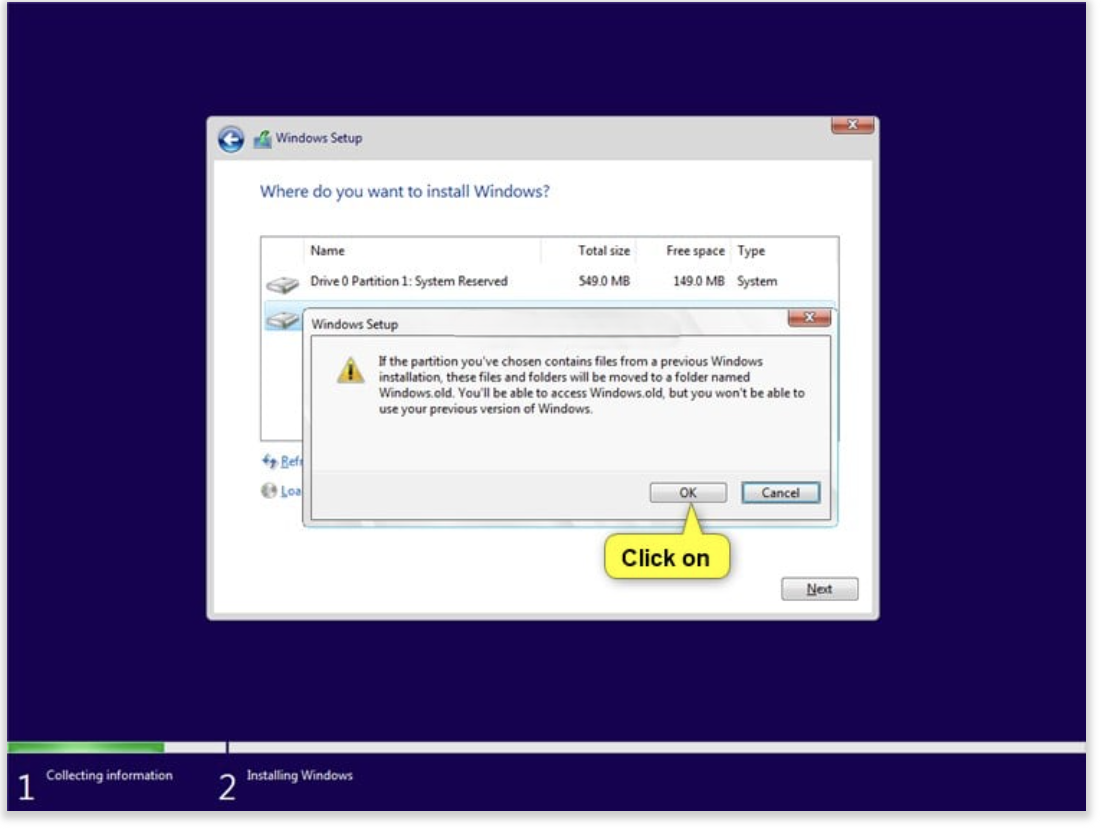
A message will appear that mentions that current Windows files will be moved to a Windows.old folder. Click OK
Windows will begin to install
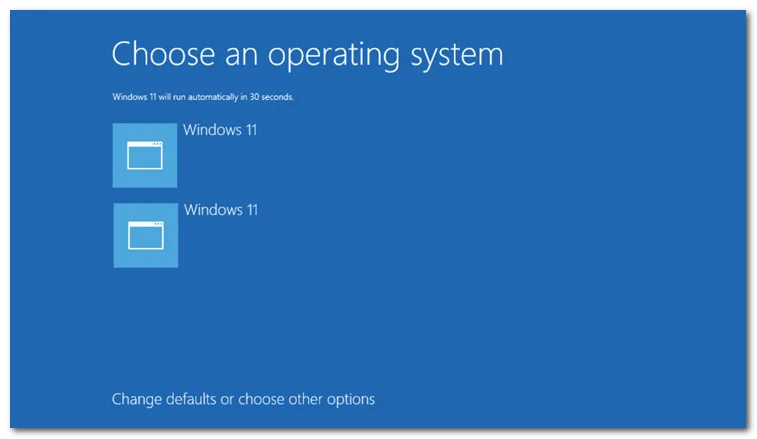
Once it’s installed you will see this screen. Click the top option
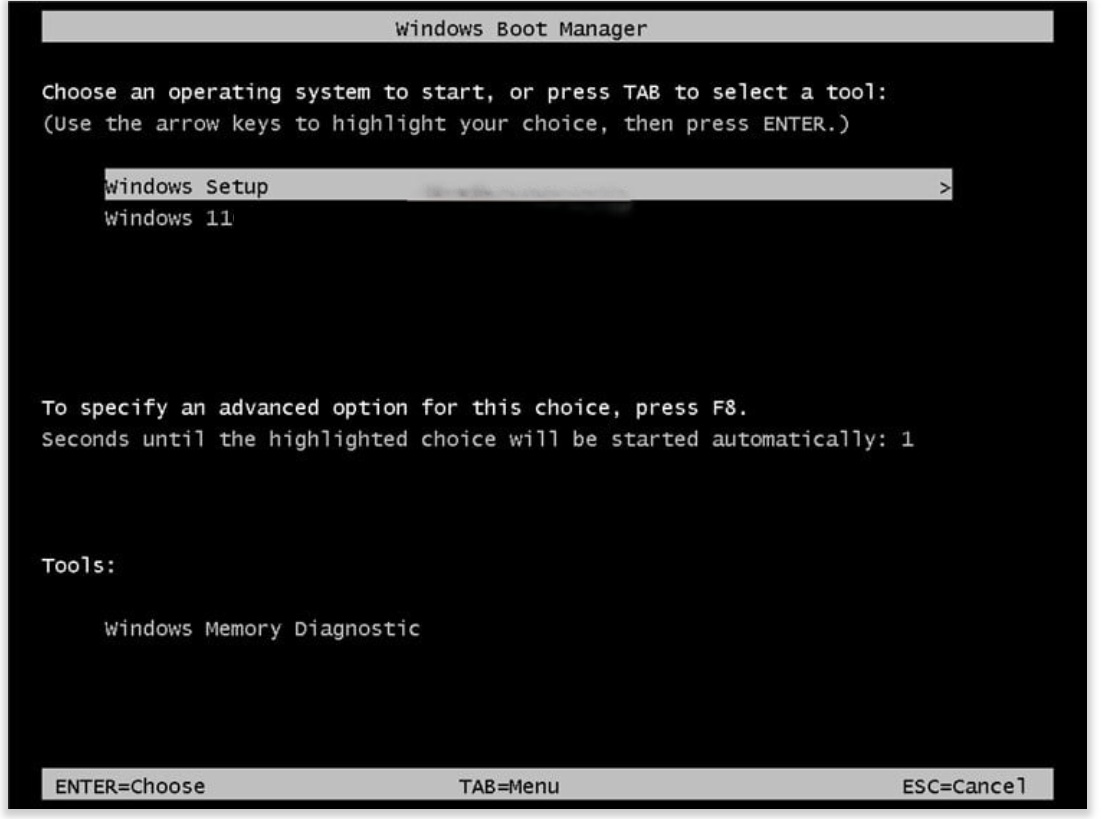
If you see the following screen select “Windows Setup” if prompted
Go thru the normal setup and sign into your Microsoft account. But don’t select to restore from a backup. Select “Other Options” and click “Setup as New”. Once you are at the desktop, you will navigate to the Windows.old folder and check if your files and programs are showing. Apps installed from the Microsoft App Store won’t be listed under Program folders
Open a Folder, goto This PC, click twice on Local Disk (C)

Double click on Windows.old

Check the “Program Files” and “Program Files (x86)” folders for your software

To locate Library files such as Documents or Photos Folder, double click on the Users folder, select the folder with the username you previously used and view the different folders for the info you are trying to retrieve.
Helpful Tip:
Find the executable file to run a program. It ends in .exe but you won’t see .exe until you uncheck “Hide extensions for known file types”. Navigate to Control Panel >Appearance & Personalization >Show Hidden Files and Folders > Uncheck the box “Hide extensions for known file types”
